Showing posts with label Ideas. Show all posts

Friday, 19 May 2017

The Bullet Journal - My First Month

Hey, it's E and today and I'm going to be talking about a recent thing I've started - my bullet journal.
So, previously I've had a Filofax and I just started to decide it didn't really work very well for me. I'm very creative and so it was just too structured and I didn't have that freedom that I wanted. I couldn't just doodle in the margin or really easily add in a sleep tracker. I'd heard about the bullet journal system before and I started to look into it in a little more depth that I already had. The more I discovered about it the more I realised I really like the system. It was coming up to then start of May so I thought it would be a great time to start. I found a notebook with plain pages that I already had (I bought it from The Range) and got started with the first few pages.

The First Pages
I started off with a very important spread - the future log for the year. I started it at May and just drew out little calendars. I put this in so I could quickly coordinate dates with days and have a log of all the birthdays I needed to remember.


Next I have my reading pages. I am an avid reader so it's really important to me to be able keep a track of all the books I want to read and have read. It's very simple but extremely functional and easy to use.


The final one of these pages is a levels record. In England we get levelled on subjects and we are always doing little assessments and it helps me to just keep a record so I can see if I'm progressing.


The First Month

To start May off I just did a little title page with some washi tape to tab it so I could easily refer back to it.


Then I stuck some nice paper onto the pages to create a noticeboard type thing so I could just easily use post it notes to put quick notes and events that are going to happen. For example, I have a post it note with the two tests I have in May.
After this I have my monthly calendar so I have space to write events that are coming up. This also gives me a easy way to view my month. I also have the goals page after this for my monthly goals. This includes things like 'use my bullet journal every day' and 'finish No Stars at the Circus'.
The final two pages before my weekly spreads are my habit tracker and my blog ideas page. The habit is really helpful for trying to instil new habits in my daily routing and the blog ideas page is great to brainstorm blog posts and design ideas.


Now we move on to my weekly spreads. So far I have three and I've already learnt a lot about what I like in the spread. So my first spread was very simple but it didn't really work me because the sections were horizontal and there wasn't much space to write tasks downwards. There was also a big gap at the bottom and I wasn't really sure how to fill this so I just wrote a quote. I feel like it wasn't a very good use of the space and was not helpful for me.


In the next spread I changed it a lot. I'd found lots of inspiration and I decided to do the days vertically. This gave me space to write more tasks which I often have a lot of. I also had more space generally so I was able to put a sleep tracker into it. I also got some great inspiration for the decoration and I was really happy with how it turned out.


My spread for this week didn't change much. All I did was change the headings slightly and moved the sleep tracker simply for a bit of a change because I don't want all the spreads to be exactly the same.


That's all I've got so far but I know I'm going to be using my bullet journal a lot since I love it already. I can be so creative and can change anything I want. If something doesn't work I don't have to include the next month and you don't get this flexibility with other planning systems. I will definitely update you with my progress and I have some good ideas for other bullet journal posts. If you want a bit more inspiration, please check out my Pinterest board (profile is TangleOfThread) for bullet journals.

Saturday, 28 January 2017

Gift Wrapping Ideas


Many people get to Christmas and birthdays and immediately loath what comes with it: gift wrapping. But, it can be fun. When you make something beautiful for someone, the first impression is important. And that first impression is how its wrapped. Here we will give some great ideas (and cheats too ;) for wrapping gifts the best way possible. All those aesthetic people out there, this for you.

1. Wrapping Paper

Although the little additions at the end make your gift look super cute, the paper you use can really make or break the final outcome. First, you need something that fits what you're wrapping for. Don't use Christmas wrapping paper for birthdays and don't use paper with firetrucks on it for a fully grown adult. Quality of paper doesn't matter as much as you may think it does. If you find 50p roll, but you love it, go for it! As long as the paper holds together, quality isn't your biggest worry. The more fun designs can often be found in cheaper like Primark and H&M. Also, always have a good range on hand. You won't always have time to go and buy some.


2. Washi Tape

Washi tape, or any other coloured/patterned tape, is a great way to give your gift that little edge that it needs. It draws a little more attention and makes it look like you've put a little more care and thought into to it. Plus, washi tape is just amazing! Pick one that matches your wrapping paper and decide whether you want it to pop out or be slightly subtle. For instance, you probably shouldn't use a patterned tape if the wrapping paper is covered in pattern already. But, if it contrasts nicely and you love that eclectic effect, it can look really good. If you're a little more elegant and plain, add some sparkly tape to give that sophisticated look.
Tip: Use a bit of clear tape first and then put the washi tape on as it often isn't actually very sticky.


3. Bows, Frills and Decoration

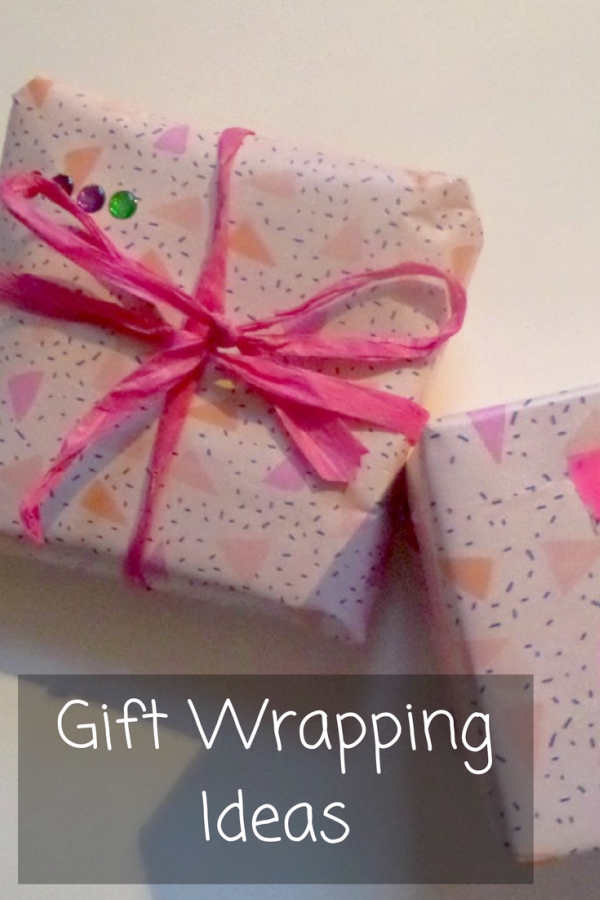
Sometimes, the perfect finish to your gift can be a perfectly placed hand-tied bow. Stuck on or wrapped around, it finished it off beautifully. Take a bit of raffia, string, cord or whatever floats your boat and tie a bow around the gift. Add decoration as well. Stick on some cute little gems or beads and embellish, embellish, embellish. You do have to be careful though, and try not to go over the top. This can make the wrapping look cluttered and a bit over done. Have fun. But restrain yourself when necessary!
Cheat: If you don't have enough string to go around the gift or don't how to tie it correctly, tie a bow and leave the strands. Then stick these around the gift and nobody will notice.


4. Be consistent

Even if you do everything in this list to perfection, it can be ruined if you're not consistent. By this I mean that you should keep the same colour pallet and using the same wrapping paper if you're wrapping more than one gift. Find paper, tape and decorations that all go to together and fit together. In different gifts you can still decorate them in different ways, but use the same paper and the similar colours for a nice coordinated look.

Please try some of these ideas and see what works for you. Plus, if you have any other ideas, we would love it if you could comment them down below. Maybe we'll include them in a future post.

Party planning: The basics

Hi, it's M today and I would like to share with you one of my favourite things to do: plan parties. I though it would be nice to give you an idea of the basics of party planning for children. I've given ideas for younger and older children but it's up to you to customise it and make it your own.

Theme
When planning a party, having a theme can really help to pull the party together. It's not essential but can be very helpful.

Age
When thinking about age you want something appropriate. If its a toddler's party don't get them doing craft or cake making because they won't be able to do it properly and it won't work. Also you don't want teenagers doing what they did when they were 5. Just bare it in mind when planning.

Activitys
For a party to be fun and engaging, you really need to think about the hobbies of the child and their friends. For example, if the child really loves ice-skating then it might be a could idea to take everybody ice-skating and have a cake that is themed on ice-skating. Or, if you don't want to go anywhere, if the child loves dancing, throw a dance battle between different teams.

Budget
Although it may seem slightly annoying budget is one the most important factors to consider. If your budget is large, you may be able to go somewhere or hire a hall and a bouncy castle. But if you have a smaller budget then this may not be possible. You can still keep the party fun though and have a really nice setup at home. Instead of buying food, consider making it yourself and maybe even have a barbecue if the weather is nice.

Now you have an idea of what sort of things you could do, you need to actually make it happen. I would suggest planning a few weeks in advance and sending invitations at least 2 weeks in advance so people have time to get back to you.

Invitations
The first thing you need to actually do is create or buy invitations. For this you can go and buy them, paperchase and hobbycraft have some really nice ones, or you can make them. If your making them, a really easy way to do it is to get some small card stock and simply write invention on them. There's so many ways to do this so be creative. If you are making them, it's really easy to tie them into your theme. For my birthday, I went for a rustic autumnal theme. So I used light pinks and blues which I used in my thank you cards. Thank you cards are another thing to think about. I would advise sorting them out at the same time as inventions because they are very similar. If you really want to save money, you could text invitations or thank yous.

Structure
Next you need to sort out some kind of structure to what your doing; this is the bit where you decide exactly what you are doing. If you have younger kids you will probably want a more structured plan but if the kids are older you may be able to be a bit more relaxed. Also, if you have something booked like a restaurant or cinema tickets you will need to have a more structured plan. So, first of all, where are you meeting. If you are going somewhere are meeting there first or are you doing something else. If you are going to a specific venue then meeting there is probably a bit easier considering you may have to be there a bit early to get things ready. So, you are at the venue. What next? Well, if you have younger kids, you'll what to get them doing something straight away so I would suggest as a structure, doing activites then having food and then doing some more relaxed activity. For example, playing outside if you're​ at home and have a garden. If you have older this structure still works. For example, doing an activity like watching a film then having some food then just letting the kids relax and chat. 

Food
Now you have got everyone doing something, you need to feed everyone. Of course you have the classic party food of samwhiches and crisps which a great if you have lots of people who have lots of different preferences. However if you have a smaller group of people, you could buy plain pizzas had toppings and people can put what they want on their own pizzas. Or if there's not many people you can ask them what they want and buy certain food. Now, the most important food at a party is sugary food. Of course, there's birthday cake but there's more than just cake. If you like baking you could​ bake something however, popcorn and other sweets are great for older kids, especially at sleepovers. For interactive desserts, you could create make your own knicker-boker-glories or add your own icecream topping. These are great for younger kids but a change to get a bit messy for younger children. Remember, food is a great chance to include your theme a bit more. For example  the birthday cake could tie into a theme or plates and table wear if you are using table wear.

Since you have your party all planned out, all you need to do is add extra details like decoration and party bags.

Decoration
Decoration is where you can really pull your theme in. Things like birthday banners with your chosen colour of theme. Ballons in certain colours. Be creative. I think if you have time making your own decorations makes it much easier to pull in your design. Go to your local craft shop and inspired.

Party bags
Party bags aren't necessary but if you have a layer budget then they are a good option. If you have younger kids then all you need is a plastic bag and some cheap little toys to keep them entertained. However older kids still don't mind silly things. Boncey balls, blow and realise ballons and lots of chocolate and sweets make a fun party bags for most children. If you want something more sepfisticated, then you can really get creative. I made custom flower crowns to match my theme. There's no limit to what you can make.

Well that is the basics of having a functining party. If you want to see more things like this then leave a comment. I would love to do some more detailed and sepcific party's. As summer is approaching, I was thinking about doing a summer party planning post. Well I will speech to you another time, bye for now and have a good party!


Sunday, 27 November 2016

Salt Dough Decorations

So Christmas is coming, and decorations are expensive. Plus I need something to do.

Well these are perfect.


Salt dough is cheap and easy to make and you can decorate it however you like.

You Will Need:
  • 2 cups of plain flour
  • 1 1/4 cups of water
  • 1 cup of salt
All you need to do is mix together the flour and the salt and then slowly mix in the water until it becomes a dough. Kneed it, roll it, cut it, and pop it on a baking tray.  Use the blunt end of a square to pock some holes so they can be hung up. Bake in an oven at about 170 degrees c for about 30 mins. Take them out and allow them to cool.

Now is the fun part, decorating.
You can paint them, use permanent makers and draw on them, you could glue on glitter.... The possibilities are endless. Really use your imaginations and create something amazing!

I hope you have fun making these. Thank you for reading!

Saturday, 29 October 2016

Easy and Cheap Halloween Decor


Now, you may be thinking: Oh my goodness, I need to sort out my Halloween stuff. Well don't worry because I have you covered with a few simple decor pieces and where to check out if you don't have time for making it yourself.

1. Halloween Banner
This one is super simple but a little time consuming. Shops always sell expense banners saying things like 'Happy Halloween' but I thought instead of spending loads of money that I would just make my own. The best bit about it is that you can make it in what ever colour or pattern you want.

You'll need
  • Some card
  • A hot glue gun
  • Scissors
  • A pen
  • Some string
1. Take your card and cut out the different letters of your message. Remember the letter will come out backwards to what you draw on the back of your card so take your time to do it right.
2. Arrange all your letters on your string and glue them on with a small amount of hot glue. Be careful with the glue because it does get very hot. 
3. Put it up somewhere and you're done.

2. Hanging ghosts
These are classic and so, so easy

You'll need
  • Some white card
  • Scissors
  • A pen
  • Some string
  • A hot glue gun or whole punch
1. Draw out the shape of your ghost on the card
2. Cut him out
3. Draw on some eyes
4. Use a small amount of hot glue to attach some string or you could use a hole punch but I found the glue looked neater. 

Theses DIYs are perfect for a small decorated area but if you holding a party or want to make your front garden really spooktacular I have got the shops to go to.

1. ASDA
ASDA has the most amazing Halloween stuff. It was always the place I would drag my mum to. Their decorations and costumes are cheap and they have a good range of childish to a bit more grown up. Its a great place to go if you are throwing a party because they have great themed serving wear.

2. The Range
This place goes all out during every season but I have too say this year their stuff is amazing. They have soo many huge statue type things and lots of decorations. Its definitely stuff to save for next year. They have great deals on high quality face paints and an array of masks for the lazy costumers. 

3. Home Sense
If you want to do Halloween like an American then this is the place to go. It is chock full of every decoration under the sun and definitely has something for everyone. 

4. Aldi
Although this isn't somewhere you would expect to see good Halloween stuff you would be surprised. They had great prices on pumpkins  so if your on a very small budget you'll find what you need there. 

I hope this helped in your Halloween quests and have a happy Halloween!


Saturday, 22 October 2016

Autumn Decor

I love Autumn, it is by far my favourite season of the year. However this year there has been a big heat wave and it doesn't feel like Autumn so to get in the mood I decided to do a bit of Autumn decor.

1. Leaf Bunting

Whats the first thing you think of when you think Autumn? Leaves, so I found a way to get some beautiful
Autumn leaves into my room.

What you need:
  • A bunch of leaves
  • A hole punch
  • Some string
  • A pair of scissors
Now this one is quite simple. All you're going to do is hole punch your leaves then thread some onto some string. I cut off most of the little branch bits to get a cleaner look but it really doesn't matter. It took no time at all and was really easy to make while also incorporating the feel of Autumn into to my room. 


2. Autumn Inspired Quote Frame

Now, this one is a bit more complicated and can be replicated for any season but I love the idea of giving it an Autumn theme.

What you need
  • One frame (I prefer a large one)
  • A lot of quotes (Can be handwritten or printed)
  • Some paper to back the quotes (optional)
  • Any other decorations for your frame (optional)
So, to begin get all your quotes and lay them out. Get the cardboard bit out of the back of your frame and start to lay out all your quotes. This might take a while but make sure you take our time and keep it all nice and neat. If you want you can glue some paper onto the cardboard back but most of it will be covered so that's optional. Then all you have got to do is use some glue to stick down all your quotes. I would suggest using prit-stick because its easy to move around once its stuck. Then all you have to do is place the cardboard part back in the frame and hang it up. I really like this one because it's super customisable to all seasons and room styles.


Saturday, 17 September 2016

Summer Projects

Its now coming to the end of the summer holidays but I still have 3 weeks left. Last week I didn't have anything to do so I found some summer activities that are much more fun than re-watching a lot of old Disney films.


1. Tie dying
I'm sure you've probably heard of this before but its so easy. Instead of buying a tie dying kit you can just use regular die for a one coloured pattern.

You will need:
  • A pack of die
  • Salt (read the instructions for the amount)
  • A lot of water
  • White or plain cloths
  • Some elastic bands
  • Something to stir with
All you have to do is follow the instructions on your die. To create the patterned effect you will need to tie your cloths in some different patterns. You can really experiment with this and have some fun!


2. Paint some furniture
This might sound really boring but its actually very rewarding.

You will need:
  • Paint - a base coat and some tester 
  • Paint bruses
  • A piece of furniture
  • Newspaper/dustsheets
We had some wooden chairs in the garage that I decided to paint but if you don't have anything lying around you can have a look in a charity shop for some cheap bargains.

All you have to do is put down your newspaper and paint. I did a base coat in a blue colour then painted a spindle and a leg pink. I also painted a chest of draws in the same way but I painted a   colourful pattern. It was really fun and it looked great when it was finished.


3. Rummage through a charity shop and find some cloths and transform them.

This might seem a bit odd but I find it really fun to transform clothes and charity shops are a great place to find cheap bargains. Slightly similar to the school project we did. It's also a great way to use up any scraps of fabric to create something completely unique. Although it's not a massive change, I transformed a grey jumper into a cropped jumper.

I hope you have a go at some of these activities and get really creative with your own ideas.

Tuesday, 1 March 2016

February's Best Bits 2016

This month, it's been starting to get a little warmer for me (like from 5 to 8 degrees) and I've been going outside a bit more. Anyway, I've compiled a few different things for this month.

1. Arts Award
So, not long ago M started her Arts Award and for anyone creative this is a really interesting thing to do. Have a look at our dedicated post about it here.


2. How about making some beautiful clothes for the upcoming spring season.


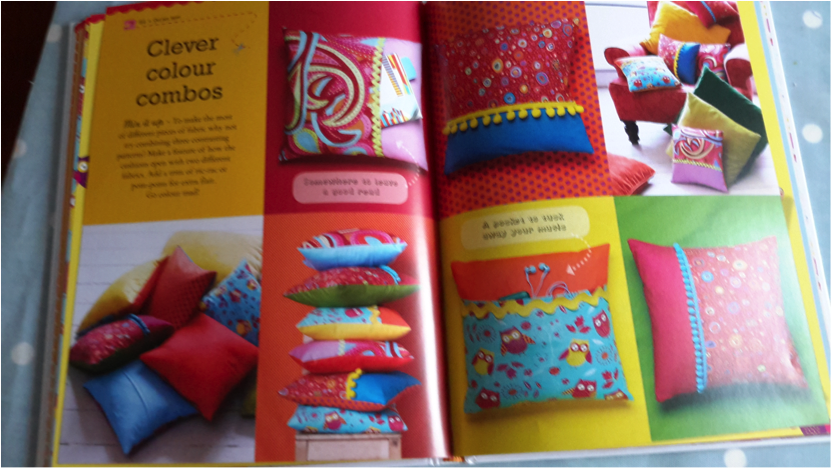
3. You could have a go at making some bright spring themed pillows to give your room a bit of spring flair. You could do the same thing with flutterbys or bunting. Both of these projects can be found in the book 'My Sewing Machine' which I talked about in January's best bits.


4. Patch work pieces
You can buy these really cheaply from bargin fabric shops but also from places like hobbycraft. You can use them to make all sorts of things like patch work quilts or bunting. 

Tuesday, 3 November 2015

Christmas Ideas

Hi everyone! I am very sorry we have not been posting much recently but I am going to give you a few ideas for Christmas presents, so get making!

Do you ever feel like your stocking could do with an update? Well why don't you add a few stitched extras?

Maybe you have a family member that could do with a new scarf? Well why don't you get a knitting book out of the library and knit them one.

You could make a wallet like in our Fathers Day Post. Use your imagination and turn it into a practical purse to give as a present.


Now this is not strictly needle craft but it is creative. You could have a go at recreating a favourite Christmas song in a different medium like trying to draw out your favourite lyrics in a cool arty style.

So have fun and give it a go!