Showing posts with label Decoration. Show all posts

Saturday, 28 January 2017

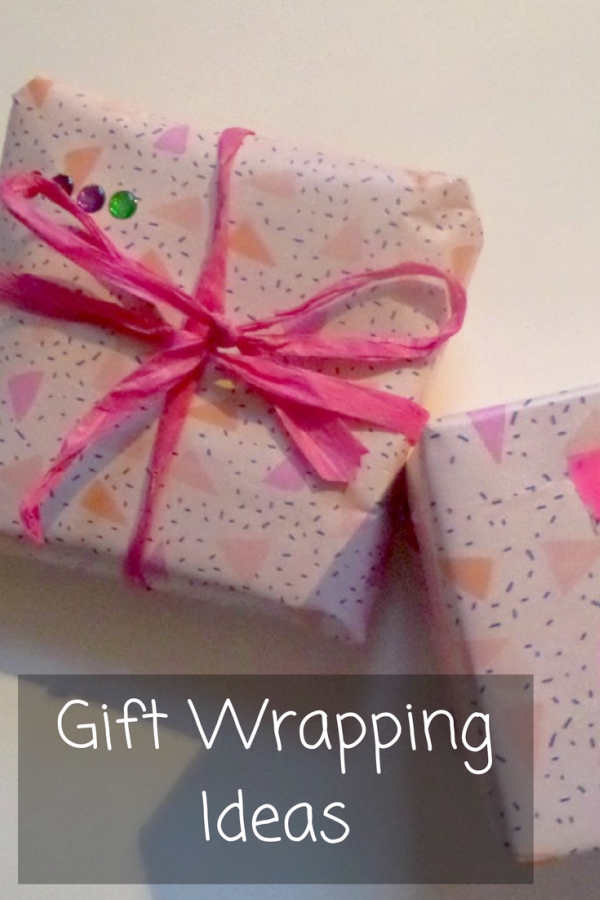
Gift Wrapping Ideas


Many people get to Christmas and birthdays and immediately loath what comes with it: gift wrapping. But, it can be fun. When you make something beautiful for someone, the first impression is important. And that first impression is how its wrapped. Here we will give some great ideas (and cheats too ;) for wrapping gifts the best way possible. All those aesthetic people out there, this for you.

1. Wrapping Paper

Although the little additions at the end make your gift look super cute, the paper you use can really make or break the final outcome. First, you need something that fits what you're wrapping for. Don't use Christmas wrapping paper for birthdays and don't use paper with firetrucks on it for a fully grown adult. Quality of paper doesn't matter as much as you may think it does. If you find 50p roll, but you love it, go for it! As long as the paper holds together, quality isn't your biggest worry. The more fun designs can often be found in cheaper like Primark and H&M. Also, always have a good range on hand. You won't always have time to go and buy some.


2. Washi Tape

Washi tape, or any other coloured/patterned tape, is a great way to give your gift that little edge that it needs. It draws a little more attention and makes it look like you've put a little more care and thought into to it. Plus, washi tape is just amazing! Pick one that matches your wrapping paper and decide whether you want it to pop out or be slightly subtle. For instance, you probably shouldn't use a patterned tape if the wrapping paper is covered in pattern already. But, if it contrasts nicely and you love that eclectic effect, it can look really good. If you're a little more elegant and plain, add some sparkly tape to give that sophisticated look.
Tip: Use a bit of clear tape first and then put the washi tape on as it often isn't actually very sticky.


3. Bows, Frills and Decoration

Sometimes, the perfect finish to your gift can be a perfectly placed hand-tied bow. Stuck on or wrapped around, it finished it off beautifully. Take a bit of raffia, string, cord or whatever floats your boat and tie a bow around the gift. Add decoration as well. Stick on some cute little gems or beads and embellish, embellish, embellish. You do have to be careful though, and try not to go over the top. This can make the wrapping look cluttered and a bit over done. Have fun. But restrain yourself when necessary!
Cheat: If you don't have enough string to go around the gift or don't how to tie it correctly, tie a bow and leave the strands. Then stick these around the gift and nobody will notice.


4. Be consistent

Even if you do everything in this list to perfection, it can be ruined if you're not consistent. By this I mean that you should keep the same colour pallet and using the same wrapping paper if you're wrapping more than one gift. Find paper, tape and decorations that all go to together and fit together. In different gifts you can still decorate them in different ways, but use the same paper and the similar colours for a nice coordinated look.

Please try some of these ideas and see what works for you. Plus, if you have any other ideas, we would love it if you could comment them down below. Maybe we'll include them in a future post.

Saturday, 29 October 2016

Easy and Cheap Halloween Decor


Now, you may be thinking: Oh my goodness, I need to sort out my Halloween stuff. Well don't worry because I have you covered with a few simple decor pieces and where to check out if you don't have time for making it yourself.

1. Halloween Banner
This one is super simple but a little time consuming. Shops always sell expense banners saying things like 'Happy Halloween' but I thought instead of spending loads of money that I would just make my own. The best bit about it is that you can make it in what ever colour or pattern you want.

You'll need
  • Some card
  • A hot glue gun
  • Scissors
  • A pen
  • Some string
1. Take your card and cut out the different letters of your message. Remember the letter will come out backwards to what you draw on the back of your card so take your time to do it right.
2. Arrange all your letters on your string and glue them on with a small amount of hot glue. Be careful with the glue because it does get very hot. 
3. Put it up somewhere and you're done.

2. Hanging ghosts
These are classic and so, so easy

You'll need
  • Some white card
  • Scissors
  • A pen
  • Some string
  • A hot glue gun or whole punch
1. Draw out the shape of your ghost on the card
2. Cut him out
3. Draw on some eyes
4. Use a small amount of hot glue to attach some string or you could use a hole punch but I found the glue looked neater. 

Theses DIYs are perfect for a small decorated area but if you holding a party or want to make your front garden really spooktacular I have got the shops to go to.

1. ASDA
ASDA has the most amazing Halloween stuff. It was always the place I would drag my mum to. Their decorations and costumes are cheap and they have a good range of childish to a bit more grown up. Its a great place to go if you are throwing a party because they have great themed serving wear.

2. The Range
This place goes all out during every season but I have too say this year their stuff is amazing. They have soo many huge statue type things and lots of decorations. Its definitely stuff to save for next year. They have great deals on high quality face paints and an array of masks for the lazy costumers. 

3. Home Sense
If you want to do Halloween like an American then this is the place to go. It is chock full of every decoration under the sun and definitely has something for everyone. 

4. Aldi
Although this isn't somewhere you would expect to see good Halloween stuff you would be surprised. They had great prices on pumpkins  so if your on a very small budget you'll find what you need there. 

I hope this helped in your Halloween quests and have a happy Halloween!


Saturday, 22 October 2016

Autumn Decor

I love Autumn, it is by far my favourite season of the year. However this year there has been a big heat wave and it doesn't feel like Autumn so to get in the mood I decided to do a bit of Autumn decor.

1. Leaf Bunting

Whats the first thing you think of when you think Autumn? Leaves, so I found a way to get some beautiful
Autumn leaves into my room.

What you need:
  • A bunch of leaves
  • A hole punch
  • Some string
  • A pair of scissors
Now this one is quite simple. All you're going to do is hole punch your leaves then thread some onto some string. I cut off most of the little branch bits to get a cleaner look but it really doesn't matter. It took no time at all and was really easy to make while also incorporating the feel of Autumn into to my room. 


2. Autumn Inspired Quote Frame

Now, this one is a bit more complicated and can be replicated for any season but I love the idea of giving it an Autumn theme.

What you need
  • One frame (I prefer a large one)
  • A lot of quotes (Can be handwritten or printed)
  • Some paper to back the quotes (optional)
  • Any other decorations for your frame (optional)
So, to begin get all your quotes and lay them out. Get the cardboard bit out of the back of your frame and start to lay out all your quotes. This might take a while but make sure you take our time and keep it all nice and neat. If you want you can glue some paper onto the cardboard back but most of it will be covered so that's optional. Then all you have got to do is use some glue to stick down all your quotes. I would suggest using prit-stick because its easy to move around once its stuck. Then all you have to do is place the cardboard part back in the frame and hang it up. I really like this one because it's super customisable to all seasons and room styles.


Monday, 14 December 2015

Christmas Table Decoration

Last year I had family come to stay so we (me and my mum) put a lot of effort in to decorating the table.

We went on the hunt for a really nice table cloth and eventually we found a really nice one in John Lewis.
Then we went to the pound shop to buy some more stuff. The pound shop has a huge range of Christmas stuff plus it was all really cheap. We found some red table mats that had really nice snowflake patterns on. We also found matching drink mat things. There were also things like table confetti but be careful because it can stain if you dont remove it from the table after a while.

Now all good tables need a table center. I used a branch which I put in a plant pot filled with gravel. You could spray the branch but I didn't. Then I decorated the branch with some posh ball balls. If you lay them out really well your table will look amazing!

You could mix up the colours or stick to a theme like I did.