Showing posts with label Gifts. Show all posts

Saturday, 25 March 2017

Recycled Paper Beads

Sometimes, you want to make some jewellery but you have no beads whatsoever. I often come up with this problem but there is a solution: homemade paper beads! Grab some paper and lets get going.

You will need:
  • Paper
  • A gluestick
  • PVA glue
  • Water
  • A skewer/bead making tool
  • Cocktail sticks
  • Small piece of polystyrene
  • Coloured pens
To actually make the beads, the best and easiest way to do it to use a bead making tool (I recommend the Recycled Paper Beads kit from green creativity. You can get it easily off Amazon). But if you don't have one, you can roll them on a skewer.

Method

1. Firstly, you need to cut the strips of paper. There are different shapes of beads you can make but I will start with the most common. Start by marking inches across the top of the paper (you can change this to suit how wide you want the beads).


2. Mark half an inch on the bottom of the paper. Continue making full inch mark along the bottom.


3. Now join all these marks up so you get triangle shapes.


4. Cut them out.
5. At this point, you will need to decorate the strips of paper. But if you have cut them out of some magazine paper or decorated paper then this won't apply. If you are decorating them, remember that you will keep rolling over the top of the design, so anything running down the middle won't be seen.


6. After decorating, you now need to roll the beads. If you are using a specialised tool, follow the instructions that come with it. If not, start by putting a line of glue on the wide section of bead. Make sure you do this on the back.
7. Now fold it the top over the skewer and glue it down. This will hold the bead in place as you roll it.


8. It is now time to create the actual bead shape! Slowly and carefully roll the piece of paper around the skewer until there is a small tail left. Use a glue stick to secure this down.


9. Slide the bead off the skewer and put it onto a cocktail stick. Stick the cocktail stick in a piece of polystyrene. This will keep the bead from the ground as it dries and make it easier to seal.


10. Once the bead as dried, you will need to make the watered down glue to seal the bead. If you have some Mod Podge, feel free to use this. But if you don't, put some PVA glue into a bowl and add water until it is a thick but runny consistency.
11. Paint this all around the bead. You may find it easier if you pick up the cocktail stick.


12. Wait for them to fully dry and then take them off the cocktail sticks. Your bead are now finished! 13. Thread them through some elastic and tie to create a wonderful bracelet or necklace.

We hope you have found this tutorial useful and comment down below if you have made some. We would love to see a picture if you have!

Saturday, 28 January 2017

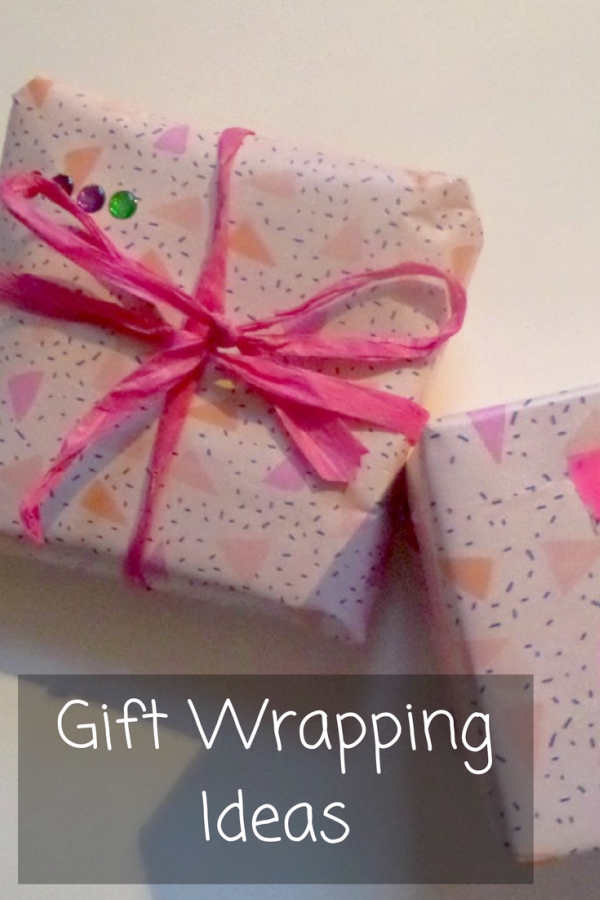
Gift Wrapping Ideas


Many people get to Christmas and birthdays and immediately loath what comes with it: gift wrapping. But, it can be fun. When you make something beautiful for someone, the first impression is important. And that first impression is how its wrapped. Here we will give some great ideas (and cheats too ;) for wrapping gifts the best way possible. All those aesthetic people out there, this for you.

1. Wrapping Paper

Although the little additions at the end make your gift look super cute, the paper you use can really make or break the final outcome. First, you need something that fits what you're wrapping for. Don't use Christmas wrapping paper for birthdays and don't use paper with firetrucks on it for a fully grown adult. Quality of paper doesn't matter as much as you may think it does. If you find 50p roll, but you love it, go for it! As long as the paper holds together, quality isn't your biggest worry. The more fun designs can often be found in cheaper like Primark and H&M. Also, always have a good range on hand. You won't always have time to go and buy some.


2. Washi Tape

Washi tape, or any other coloured/patterned tape, is a great way to give your gift that little edge that it needs. It draws a little more attention and makes it look like you've put a little more care and thought into to it. Plus, washi tape is just amazing! Pick one that matches your wrapping paper and decide whether you want it to pop out or be slightly subtle. For instance, you probably shouldn't use a patterned tape if the wrapping paper is covered in pattern already. But, if it contrasts nicely and you love that eclectic effect, it can look really good. If you're a little more elegant and plain, add some sparkly tape to give that sophisticated look.
Tip: Use a bit of clear tape first and then put the washi tape on as it often isn't actually very sticky.


3. Bows, Frills and Decoration

Sometimes, the perfect finish to your gift can be a perfectly placed hand-tied bow. Stuck on or wrapped around, it finished it off beautifully. Take a bit of raffia, string, cord or whatever floats your boat and tie a bow around the gift. Add decoration as well. Stick on some cute little gems or beads and embellish, embellish, embellish. You do have to be careful though, and try not to go over the top. This can make the wrapping look cluttered and a bit over done. Have fun. But restrain yourself when necessary!
Cheat: If you don't have enough string to go around the gift or don't how to tie it correctly, tie a bow and leave the strands. Then stick these around the gift and nobody will notice.


4. Be consistent

Even if you do everything in this list to perfection, it can be ruined if you're not consistent. By this I mean that you should keep the same colour pallet and using the same wrapping paper if you're wrapping more than one gift. Find paper, tape and decorations that all go to together and fit together. In different gifts you can still decorate them in different ways, but use the same paper and the similar colours for a nice coordinated look.

Please try some of these ideas and see what works for you. Plus, if you have any other ideas, we would love it if you could comment them down below. Maybe we'll include them in a future post.